IMPORTANT! READ THIS!
Hello there! This article is outdated and following it will only confuse you. Check out the embedded Rust book and the rest of the embedded WG bookshelf for up to date and maintained documentation on embedded Rust development.
If you still want to read this post, for historical reasons and what now, scroll down.
Want to program your microcontroller in Rust but your microcontroller vendor
doesn’t provide a Rust HAL / SDK? No wonder. AFAIK, no vendor is betting for
Rust … yet. How about binding to a C HAL? No? Don’t feel like wrestling with
bindgen and the HAL build system and then having a bunch of unsafe FFI calls
in your application? OK, how’s this alternative: A method to easily build 100%
Rust applications that can use all the device hardware through a memory safe
API? Sounds good? Excellent because that’s today menu.
In this post, I’ll cover how to build an application for a Cortex-M microcontroller from scratch. However, I’m going to take a practical approach here and omit explaining low level details like linker scripts and the boot sequence. There are crates published on crates.io that deal with those low level details so we’ll leverage those instead of reinventing the wheel.
The test subject
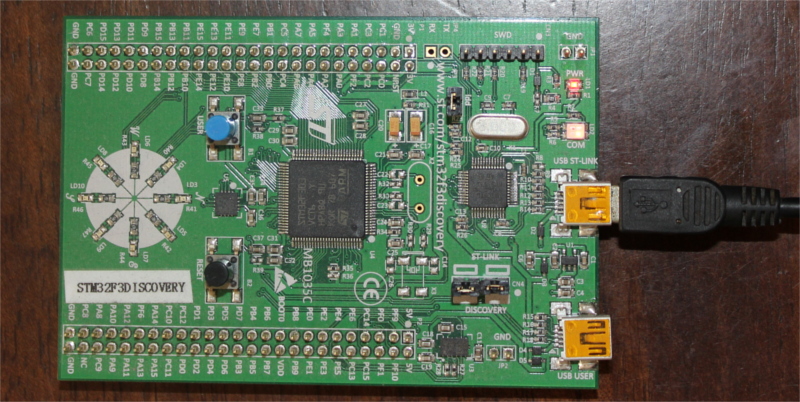
For this demo, I’m going to use the STM32F3DISCOVERY development board but the steps here can be adapted to any other development board. Here are the specifications of the DISCOVERY board:
- Microcontroller: STM32F303VCT6
- Core: ARM Cortex-M4 + FPU
- RAM: 40+8 1 KiB 2
- Flash: 256 KiB
- Peripherals: Timers, Serial, I2C, SPI, PWM, etc.
The tools
We’ll need these tools on the host system:
- A nightly Rust toolchain.
- Xargo, to build the
corecrate on the fly. - A linker: GNU ld 3.
- A debugger: GDB 4.
- OpenOCD, to communicate with the in-circuit / external programmer. (The DISCOVERY board has a built-in SWD based programmer)
Installation instructions for Arch Linux:
$ # Switch to the nightly channel
$ rustup default nightly-2017-04-24

$ rustc -V
rustc 1.18.0-nightly (2bd4b5c6d 2017-04-23)

$ sudo pacman -S arm-none-eabi-binutils arm-none-eabi-gdb openocd

$ arm-none-eabi-ld -V | head -n1
GNU ld (GNU Binutils) 2.28

$ arm-none-eabi-gdb -v | head -n1
GNU gdb (GDB) 7.12.1

$ openocd -v 2>&1 | head -n1
Open On-Chip Debugger 0.10.0

$ cargo install xargo

$ xargo -V
xargo 0.3.6
cargo 0.19.0-nightly (8326a3683 2017-04-19)

$ # for Xargo
$ rustup component add rust-src
You can find installation instructions for Windows and macOS here.
The Cargo project template
We’ll use the cortex-m-quickstart crate as a template 5; it
contains all the pieces needed to build a microcontroller application. This
template should work for any microcontroller that lets you override the boot
sequence 6. I have tested this template with 6 different
microcontrollers / development boards from 3 different vendors 7 without
a hitch.
$ # if you don't have the `clone` subcommand
$ cargo install cargo-clone

$ cargo clone cortex-m-quickstart --vers 0.1.1

$ mv cortex-m-quickstart demo && cd $_

$ # change project name and author
$ edit Cargo.toml && head $_
[package]
authors = ["Jorge Aparicio <jorge@japaric.io>"]
name = "demo"
version = "0.1.0"
Each microcontroller has different amounts of RAM and Flash memory, and the
location of these memory regions in the address space can vary from vendor to
vendor. We have to specify this information in the memory.x file to produce a
binary that’s valid for the target device. For this demo, I’ll use this
file 8:
$ edit memory.x && cat $_
MEMORY
{
  /* NOTE K = KiBi = 1024 bytes */
  FLASH : ORIGIN = 0x08000000, LENGTH = 256K
  RAM : ORIGIN = 0x20000000, LENGTH = 40K
}

/* NOTE Do NOT modify `_stack_start` unless you know what you are doing */
_stack_start = ORIGIN(RAM) + LENGTH(RAM);
The memory layout of the program will look like this:

The .bss + .data region is where static variables are stored. The size of
this region is known at compile time and doesn’t change at runtime. The call
stack region can grow or shrink at runtime due to function calls. There’s no
heap 9.
Finally, for convenience we set a default target in .cargo/config. With this
we can omit the --target flag on every Xargo invocation.
$ cat >>.cargo/config <<'EOF'
[build]
target = "thumbv7em-none-eabihf"
EOF
The target chosen here must match the ARM core inside the target device. There are four options:
thumbv6m-none-eabi, for Cortex M0 and M0+ devices.thumbv7m-none-eabi, for Cortex M3 devices.thumbv7em-none-eabi, for Cortex M4 and M7 devices. No FPU.thumbv7em-none-eabihf, for Cortex M4 and M7 devices. With FPU.
UPDATE (2017-05-16) Incremental compilation appears to not work with builds that need to customize linker sections so you’ll have to disable it to do embedded development:
$ # disable incremental compilation (if you were using it)
$ unset CARGO_INCREMENTAL
Hello, world!
We are done setting up the template. Let’s build examples/hello.rs as our
first program. This program will print "Hello, world!" on the host
console. This program is written in a device agnostic manner and will work on
any microcontroller. The only requirement to be able to see the message on the
host side is a GDB connection between host and device.
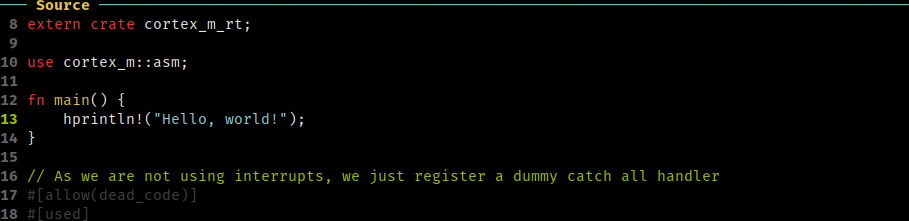
For convenience, here’s the full source of the program:
//! Prints "Hello, world!" on the OpenOCD console using semihosting

#![feature(used)]
#![no_std]

#[macro_use]
extern crate cortex_m;
extern crate cortex_m_rt;

use cortex_m::asm;

fn main() {
    hprintln!("Hello, world!");
}

// As we are not using interrupts, we just register a dummy catch all handler
#[allow(dead_code)]
#[used]
#[link_section = ".rodata.interrupts"]
static INTERRUPTS: [extern "C" fn(); 240] = [default_handler; 240];

extern "C" fn default_handler() {
    asm::bkpt();
}
At first glance, it looks kind of normal – it has a main function like the
programs that link to std. Let’s inspect it in parts.
#![no_std]
We don’t link to std as std doesn’t support microcontrollers.
#[macro_use]
extern crate cortex_m;
extern crate cortex_m_rt;
The cortex-m-rt crate is a very small runtime that boots the device,
initializes RAM and then calls main. It does all this implicitly; you only
need to link to it with extern crate to opt into this runtime. The cortex-m
crate provides an API to use functionality common to all Cortex-M
microcontrollers.
fn main() {
    hprintln!("Hello, world!");
}
In main, we use the hprintln! macro from the cortex-m crate to print the
message to the OpenOCD console 10. The syntax is the same as
println! in std.
#[allow(dead_code)]
#[used]
#[link_section = ".rodata.interrupts"]
static INTERRUPTS: [extern "C" fn(); 240] = [default_handler; 240];
There’s also this INTERRUPTS variable. This variable is used to register
interrupt handlers. As we are not using any interrupt we just register a catch
all handler for all the possible interrupt sources.
Let’s now build this program.
$ xargo build --example hello

$ arm-none-eabi-readelf -A target/thumbv7em-none-eabihf/debug/examples/hello                          <<<
Attribute Section: aeabi
File Attributes
  Tag_conformance: "2.09"
  Tag_CPU_arch: v7E-M
  Tag_CPU_arch_profile: Microcontroller
  Tag_THUMB_ISA_use: Thumb-2
  Tag_FP_arch: VFPv4-D16
  Tag_ABI_PCS_GOT_use: direct
  Tag_ABI_FP_denormal: Needed
  Tag_ABI_FP_exceptions: Needed
  Tag_ABI_FP_number_model: IEEE 754
  Tag_ABI_align_needed: 8-byte
  Tag_ABI_align_preserved: 8-byte, except leaf SP
  Tag_ABI_HardFP_use: SP only
  Tag_ABI_VFP_args: VFP registers
  Tag_ABI_optimization_goals: Prefer Debug
  Tag_CPU_unaligned_access: v6
  Tag_FP_HP_extension: Allowed
  Tag_ABI_FP_16bit_format: IEEE 754
And then run it on the microcontroller.
$ # On one terminal. Leave this running
$ openocd -f interface/stlink-v2-1.cfg -f target/stm32f3x.cfg
(..)
Info : clock speed 950 kHz
Info : STLINK v2 JTAG v27 API v2 SWIM v15 VID 0x0483 PID 0x374B
Info : using stlink api v2
Info : Target voltage: 2.920499
Info : stm32f3x.cpu: hardware has 6 breakpoints, 4 watchpoints
$ # On another terminal
$ # Enable safe loading of .gdbinit scripts
$ echo 'set auto-load safe-path /' >> ~/.gdbinit

$ arm-none-eabi-gdb target/thumbv7em-none-eabihf/debug/examples/hello
Thanks to the .gdbinit in the root of the Cargo project, the debugger will
drop you at the entry point of the program, which is where the program starts
its execution. In the source view, you can see that the cortex-m-rt runtime
does what I said it does.
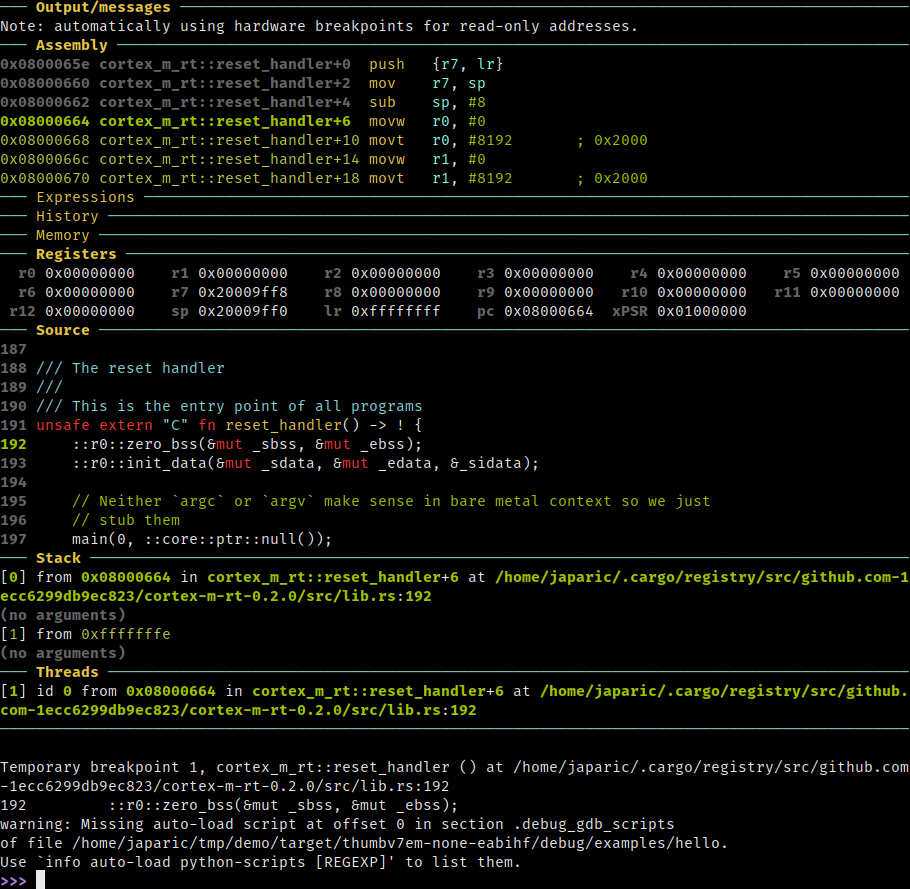
(gdb-dashboard, if you were wondering “Hey, what’s that cool GDB UI?")
From that point you can step through the program all the way to main but the
fastest way to get there is to set a breakpoint and let the program run:
> # On the GDB shell
> tbreak hello::main
> continue
You should see:
After you step over the hprintln! line, you should see this on the OpenOCD
terminal:
$ # On the OpenOCD terminal
(..)
Info : halted: PC: 0x08000a30
Hello, world!
Info : halted: PC: 0x08000414
There you go: An embedded “Hello, world” in Rust.
Some of you may be wondering whats happens when main returns since embedded
programs are supposed to never end. What the runtime does is put the device in
“reactive” mode (loop { asm!("wfi") }), where it services interrupts and
then sleeps when there’s nothing to do.
A digression: Other runtime features
The cortex-m-rt ships with a few extra optional features that result in a more
pleasant development experience. I think they are just too good to miss the
opportunity of showing them to you so let me show two use cases where they come
in handy:
Debugging an exception
Consider this program: (See examples/crash.rs for the full source).
fn main() {
    // Read an invalid memory address
    unsafe {
        ptr::read_volatile(0x2FFF_FFFF as *const u32);
    }
}
It tries to read an invalid memory address. Although this is kinda obvious from the source code (if you know what typical RAM addresses look like), let’s see how the runtime would have helped us debug this problem.
If you debug this program and just leave it run freely, you’ll end with a debug session like the one shown below.
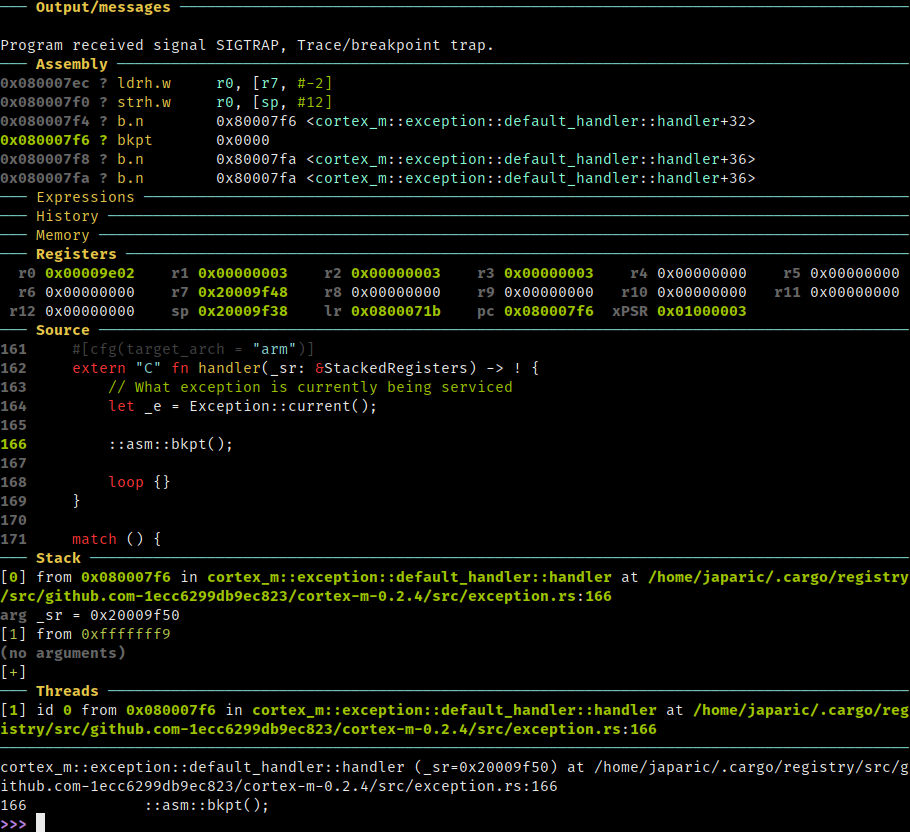
Fatal errors like this invalid memory access are handled by the hardware through an exception mechanism. When such an error occurs, the processor stops doing whatever it was doing and immediately calls the corresponding exception handler, which is just a function from the POV of the programmer.
The cortex-m-rt crate injects a catch all exception handler tailored for
debugging. This handler will trigger a breakpoint during an exception and give
you access to plenty of information about the cause of the exception.
Continuing the debug session: A backtrace will give us a general idea of
where we came from:
> # Where did we come from?
> backtrace
#0  cortex_m::exception::default_handler::handler (_sr=0x20009f50) at $CARGO_HOME/registry/src/github.com-1ecc6299db9ec823/cortex-m-0.2.4/src/exception.rs:166
#1  <signal handler called>
#2  core::ptr::read_volatile<u32> (src=0x2fffffff) at $SYSROOT/lib/rustlib/src/rust/src/libcore/ptr.rs:331
#3  0x08000442 in crash::main () at $PWD/examples/crash.rs:11
#4  0x08000684 in cortex_m_rt::lang_items::start (main=0x8000435 <crash::main>, _argc=0, _argv=0x0) at $CARGO_HOME/registry/src/github.com-1ecc6299db9ec823/cortex-m-rt-0.2.0/src/lang_items.rs:61
#5  0x08000484 in main ()
<signal handler called> is the hardware calling the exception handler, so
read_volatile is where the exception occurred.
Within the exception handler context, there’s this Exception value which
indicates what kind of exception was raised.
> # What exception did we hit?
> p _e
$1 = cortex_m::exception::Exception::HardFault
There are different kinds of exceptions and each one has its own handler. The hard fault exception is the exception that’s called when a invalid memory access occurs or when the processor tries to execute an invalid instruction, among other fatal errors.
There’s also this StackedRegisters value, this is a snapshot of the CPU
registers at the time the exception occurred.
> # What was the state of the program when the exception occurred?
> print/x *_sr
$2 = cortex_m::exception::StackedRegisters {
  r0: 0x2fffffff,
  r1: 0x2fffffff,
  r2: 0x0,
  r3: 0x0,
  r12: 0x0,
  lr: 0x8000427,
  pc: 0x8000408,
  xpsr: 0x61000200
}
Perhaps the most important of these registers is the pc (Program Counter)
register; it points to the instruction that triggered the exception. We can
disassemble the program around that instruction to investigate further:
> # What instruction generated the exception?
> disassemble /m _sr.pc
Dump of assembler code for function core::ptr::read_volatile<u32>:
330     pub unsafe fn read_volatile<T>(src: *const T) -> T {
   0x08000400 <+0>:     sub     sp, #20
   0x08000402 <+2>:     mov     r1, r0
   0x08000404 <+4>:     str     r0, [sp, #8]
   0x08000406 <+6>:     str     r0, [sp, #12]

331         intrinsics::volatile_load(src)
   0x08000408 <+8>:     ldr     r0, [r0, #0]
   0x0800040a <+10>:    str     r0, [sp, #16]
   0x0800040c <+12>:    str     r1, [sp, #4]
   0x0800040e <+14>:    str     r0, [sp, #0]
   0x08000410 <+16>:    b.n     0x8000412 <core::ptr::read_volatile<u32>+18>

332     }
   0x08000412 <+18>:    ldr     r0, [sp, #0]
   0x08000414 <+20>:    add     sp, #20
   0x08000416 <+22>:    bx      lr

End of assembler dump.
0x08000408: ldr r0, [r0, #0] is pointed out as the culprit. This instruction
tries to load the value stored at the address indicated by the r0 register.
From the StackedRegisters value, we know that r0 was 0x2fffffff. This
must mean that the address 0x2fffffff is invalid as in it must not be in the
RAM or Flash memory region. Which is exactly the case here.
Redirection of panic! messages
Another nifty thing that the cortex-m-rt crate can do is print panic!
messages on the OpenOCD console just like the hprintln! macro does.
Consider this program (See examples/panic.rs for the full source).
fn main() {
    panic!("Oops");
}
If we enable the panic-over-semihosting feature of the cortex-m-rt crate,
we’ll see the panic! message appear on the OpenOCD console when the program is
executed under the debugger.
$ # On the OpenOCD console
(..)
Info : halted: PC: 0x0800160c
panicked at 'Oops', examples/panic.rs:24
Line and source file information will show up just like they do when a regular
Rust program panics. This is pretty useful to catch bugs like arithmetic
overflow and out of bounds accesses. Oh, and panic!s trigger breakpoints just
like exceptions so you can use backtrace within the GDB session to get a
backtrace.
Full device support
Now that we have verified that both the tooling and the template work, we can go ahead and build a program that makes use of the device hardware.
As you may know, using the hardware requires reading and writing to special memory regions referred to as registers. The reference manual of the microcontroller 11 contains all there is to know about a microcontroller’s registers: their locations in memory and what their contents mean. You could translate that information into an API but that’s a lot of work and error prone.
A better way is to auto-generate that API from the microcontroller’s System View
Description (SVD) file using a tool like svd2rust. A SVD file is basically
a machine readable version of the reference manual. Most vendors provide these
for their devices. Here’s a database of such files – it contains more than
500 SVD files. If you don’t find a SVD file for your device there, check your
microcontroller vendor website or ask them directly.
Let’s use svd2rust on the SVD file of the STM32F303VCT6 microcontroller
12 13.
$ cd ..

$ cargo new --lib stm32f30x && cd $_

$ # Fetch the SVD from the database
$ curl -LO https://github.com/posborne/cmsis-svd/raw/python-0.4/data/STMicro/STM32F30x.svd
$ dos2unix STM32F30x.svd

$ # Patch the SVD for extra type safety
$ curl -L https://github.com/japaric/stm32f30x/raw/v0.4.0/STM32F30x.patch | patch -p1

$ cargo install svd2rust --vers 0.7.0

$ # Turn the SVD file into a device crate
$ svd2rust -i STM32F30x.svd | rustfmt > src/lib.rs

$ # Wow, you certainly don't want to write all that by hand!
$ wc src/lib.rs
 226424 1153424 7689220 src/lib.rs

$ # if you don't have the `add` subcommand
$ cargo install cargo-edit

$ # Dependencies of the device crate
$ cargo add cortex-m vcell

$ # sanity check
$ xargo build --target thumbv7em-none-eabihf
That wasn’t too hard and 200K+ lines of Rust just materialized from thin air.
The output of svd2rust is a crate that provides an API to access every one
of the microcontroller’s peripherals. The API is relatively low level as it
operates at the register level but it’s type safe: It won’t let you
- Write to read-only registers.
- Read write-only registers.
- Read or write to the reserved parts of a register.
- Write invalid bit patterns to a register. For example, the 2 lowest bits of a
register may only support the values
0b01,0b10and0b11– the API enforces that those are the only values that you can write to those two bits.
Apart from avoiding those footguns, the API uses enums / methods instead of
magic bit patterns like 0b01 for clarity. The generated API is documented
here.
Blinky
Armed with an API to access the hardware, we now can write the real “Hello, world!” of the embedded world: A program to blink an LED.
There’s no example for this in cortex-m-quickstart as the implementation is
device and board specific but here’s the code for the STM32F3DISCOVERY:
// examples/blinky.rs

#![feature(used)]
#![no_std]

// version = "0.2.0", default-features = false
extern crate cast;
extern crate cortex_m;
extern crate cortex_m_rt;
extern crate stm32f30x;

use core::u16;

use cast::{u16, u32};
use cortex_m::asm;
use stm32f30x::{GPIOE, RCC, TIM7};

mod frequency {
    /// Frequency of APB1 bus (TIM7 is connected to this bus)
    pub const APB1: u32 = 8_000_000;
}

/// Timer frequency
const FREQUENCY: u32 = 1;

#[inline(never)]
fn main() {
    // Critical section, this closure is non-preemptable
    cortex_m::interrupt::free(
        |cs| {
            // INITIALIZATION PHASE
            // Exclusive access to the peripherals
            let gpioe = GPIOE.borrow(cs);
            let rcc = RCC.borrow(cs);
            let tim7 = TIM7.borrow(cs);

            // Power up the relevant peripherals
            rcc.ahbenr.modify(|_, w| w.iopeen().enabled());
            rcc.apb1enr.modify(|_, w| w.tim7en().enabled());

            // Configure the pin PE9 as an output pin
            gpioe.moder.modify(|_, w| w.moder9().output());

            // Configure TIM7 for periodic timeouts
            let ratio = frequency::APB1 / FREQUENCY;
            let psc = u16((ratio - 1) / u32(u16::MAX)).unwrap();
            tim7.psc.write(|w| w.psc().bits(psc));
            let arr = u16(ratio / u32(psc + 1)).unwrap();
            tim7.arr.write(|w| w.arr().bits(arr));
            tim7.cr1.write(|w| w.opm().continuous());

            // Start the timer
            tim7.cr1.modify(|_, w| w.cen().enabled());

            // APPLICATION LOGIC
            let mut state = false;
            loop {
                // Wait for an update event
                while tim7.sr.read().uif().is_no_update() {}

                // Clear the update event flag
                tim7.sr.modify(|_, w| w.uif().clear());

                // Toggle the state
                state = !state;

                // Blink the LED
                if state {
                    gpioe.bsrr.write(|w| w.bs9().set());
                } else {
                    gpioe.bsrr.write(|w| w.br9().reset());
                }
            }
        },
    );
}

// This part is the same as before
#[allow(dead_code)]
#[used]
#[link_section = ".rodata.interrupts"]
static INTERRUPTS: [extern "C" fn(); 240] = [default_handler; 240];

extern "C" fn default_handler() {
    asm::bkpt();
}
It’s not necessary to understand every single line of the previous program as it contains low level device specific code. But here are some things to note:
-
There’s no
unsafecode! Peripherals are global resources and microcontrollers have hardware support for preemption in the form of interrupts and exceptions so unsynchronized access to a peripheral isunsafein the general case. Here we add synchronization in the form of a critical section (interrupt::free) which ensures that the whole closure is executed “atomically”, i.e. without being interrupted. -
Once we are inside a critical section, we can safely
borrow/ access the peripheralsGPIOE,RCCandTIM7for the duration of the critical section. -
The program never ends; there’s an infinite
loopthat prevents that. -
The timer is configured to generate an update event every second. The timer notifies the processor about the update event by setting an update event flag, which is just a bit at some known memory location. In this program, we continuously check for the state of the flag to force the processor to wait for 1 second before toggling the state of the LED. This continuous polling approach is known as busy waiting.
And here’s the outcome:
$ # depend on the previously generated device crate
$ cargo add stm32f30x --path ../stm32f30x

$ xargo build --example blinky

$ arm-none-eabi-gdb target/thumbv7em-none-eabihf/debug/examples/blinky
(..)
Yay, it works!
But the best part is the disassembly of the program when compiled in release mode.
$ xargo build --example blinky --release

$ arm-none-eabi-objdump -Cd target/thumbv7em-none-eabihf/release/examples/blinky
08000400 <blinky::main>:
 8000400:	b580        push	{r7, lr}
 8000402:	f3ef 8010   mrs	r0, PRIMASK
 8000406:	b672        cpsid	i
 8000408:	2201        movs	r2, #1
 800040a:	2300        movs	r3, #0
 800040c:	f04f 7c00   mov.w	ip, #33554432	; 0x2000000
 8000410:	f44f 7e00   mov.w	lr, #512	; 0x200
 8000414:	f241 0014   movw	r0, #4116	; 0x1014
 8000418:	f2c4 0002   movt	r0, #16386	; 0x4002
 800041c:	6801        ldr	r1, [r0, #0]
 800041e:	f441 1100   orr.w	r1, r1, #2097152	; 0x200000
 8000422:	6001        str	r1, [r0, #0]
 8000424:	6881        ldr	r1, [r0, #8]
 8000426:	f041 0120   orr.w	r1, r1, #32
 800042a:	6081        str	r1, [r0, #8]
 800042c:	f241 0000   movw	r0, #4096	; 0x1000
 8000430:	f6c4 0000   movt	r0, #18432	; 0x4800
 8000434:	6801        ldr	r1, [r0, #0]
 8000436:	f362 4193   bfi	r1, r2, #18, #2
 800043a:	227a        movs	r2, #122	; 0x7a
 800043c:	6001        str	r1, [r0, #0]
 800043e:	f241 4100   movw	r1, #5120	; 0x1400
 8000442:	f2c4 0100   movt	r1, #16384	; 0x4000
 8000446:	628a        str	r2, [r1, #40]	; 0x28
 8000448:	f64f 6210   movw	r2, #65040	; 0xfe10
 800044c:	62ca        str	r2, [r1, #44]	; 0x2c
 800044e:	600b        str	r3, [r1, #0]
 8000450:	680a        ldr	r2, [r1, #0]
 8000452:	f042 0201   orr.w	r2, r2, #1
 8000456:	600a        str	r2, [r1, #0]
 8000458:	e00d        b.n	8000476 <blinky::main+0x76>
 800045a:	690a        ldr	r2, [r1, #16]
 800045c:	f013 0f01   tst.w	r3, #1
 8000460:	f022 0201   bic.w	r2, r2, #1
 8000464:	610a        str	r2, [r1, #16]
 8000466:	f083 0201   eor.w	r2, r3, #1
 800046a:	bf14        ite	ne
 800046c:	f8c0 c018   strne.w	ip, [r0, #24]
 8000470:	f8c0 e018   streq.w	lr, [r0, #24]
 8000474:	4613        mov	r3, r2
 8000476:	690a        ldr	r2, [r1, #16]
 8000478:	f012 0f01   tst.w	r2, #1
 800047c:	d0fb        beq.n	8000476 <blinky::main+0x76>
 800047e:	e7ec        b.n	800045a <blinky::main+0x5a>
The svd2rust generated API makes heavy use of closures and enums for type
safety, and of method chains for ergonomics but LLVM optimizes all that away and
produces very lean code. Also notice how there are no panic! branches; LLVM
proved that the failure branches of the unwrap methods were unreachable and
optimized them away. This shows that the type safety provided by the svd2rust
generated API is zero cost.
Board Support Crates
Although you could go ahead and build applications just using the register level
API that svd2rust generates, it’s nicer if you can code in something higher
level and that abstracts away the registers. That’s where Board Support Crates
come in.
A board support crate provides a high level API to program a specific
development board. I have developed one such crate for the STM32F3DISCOVERY: the
f3 crate. Let’s use that crate to simplify the blinky program.
// examples/blinky2.rs

#![feature(used)]
#![no_std]

// version = "0.2.4"
extern crate cortex_m;

// version = "0.2.0"
extern crate cortex_m_rt;

// version = "0.4.0"
extern crate f3;

use cortex_m::asm;
use f3::led::{self, LEDS};
use f3::stm32f30x::{GPIOE, RCC, TIM7};
use f3:⏲:Timer;

/// Timer frequency
const FREQUENCY: u32 = 1;

#[inline(never)]
fn main() {
    // Critical section
    cortex_m::interrupt::free(
        |cs| {
            // Exclusive access to the peripherals
            let gpioe = GPIOE.borrow(cs);
            let rcc = RCC.borrow(cs);
            let tim7 = TIM7.borrow(cs);

            // Configure the PEx pins as output pins
            led::init(gpioe, rcc);

            // Configure TIM7 for periodic timeouts
            let timer = Timer(tim7);
            timer.init(rcc, FREQUENCY);

            // Start the timer
            timer.resume();

            let mut state = false;
            loop {
                // Wait for an update event *and* clear the update event flag
                while timer.clear_update_flag().is_err() {}

                // Toggle the state
                state = !state;

                // Blink the LED
                if state {
                    LEDS[0].on();
                } else {
                    LEDS[0].off();
                }
            }
        },
    );

}

// This part is the same as before
#[allow(dead_code)]
#[used]
#[link_section = ".rodata.interrupts"]
static INTERRUPTS: [extern "C" fn(); 240] = [default_handler; 240];

extern "C" fn default_handler() {
    asm::bkpt();
}
All the register names are gone. The Timer abstraction encodes the idea of a
timer that generates periodic update events. Even the LEDs have their own
abstraction in the form of the Led type. And LEDS is a collection of all the
user LEDs on the board.
Behavior is unchanged after moving to the f3 crate so I’m not going to show
another video of the same thing. Let’s see how the new program does in terms of
performance.
$ # Remove the device crate
$ cargo rm stm32f30x

$ # Add the board support crate
$ cargo add f3 --vers 0.4.0

$ # the f3 crate provides a memory.x file so we must the remove the one we have
$ rm build.rs memory.x

$ xargo build --example blinky2 --release

$ arm-none-eabi-objdump -Cd target/thumbv7em-none-eabihf/release/examples/blinky
08000400 <blinky2::main>:
 8000400:	b580        push	{r7, lr}
 8000402:	f241 0114   movw	r1, #4116	; 0x1014
 8000406:	f3ef 8010   mrs	r0, PRIMASK
 800040a:	b672        cpsid	i
 800040c:	2300        movs	r3, #0
 800040e:	f04f 7c00   mov.w	ip, #33554432	; 0x2000000
 8000412:	f44f 7e00   mov.w	lr, #512	; 0x200
 8000416:	f2c4 0102   movt	r1, #16386	; 0x4002
 800041a:	6808        ldr	r0, [r1, #0]
 800041c:	f440 1000   orr.w	r0, r0, #2097152	; 0x200000
 8000420:	6008        str	r0, [r1, #0]
 8000422:	f241 0000   movw	r0, #4096	; 0x1000
 8000426:	f6c4 0000   movt	r0, #18432	; 0x4800
 800042a:	6802        ldr	r2, [r0, #0]
 800042c:	f2c5 5255   movt	r2, #21845	; 0x5555
 8000430:	6002        str	r2, [r0, #0]
 8000432:	688a        ldr	r2, [r1, #8]
 8000434:	f042 0220   orr.w	r2, r2, #32
 8000438:	608a        str	r2, [r1, #8]
 800043a:	f241 4100   movw	r1, #5120	; 0x1400
 800043e:	227a        movs	r2, #122	; 0x7a
 8000440:	f2c4 0100   movt	r1, #16384	; 0x4000
 8000444:	628a        str	r2, [r1, #40]	; 0x28
 8000446:	f64f 6210   movw	r2, #65040	; 0xfe10
 800044a:	62ca        str	r2, [r1, #44]	; 0x2c
 800044c:	2201        movs	r2, #1
 800044e:	60ca        str	r2, [r1, #12]
 8000450:	600b        str	r3, [r1, #0]
 8000452:	680a        ldr	r2, [r1, #0]
 8000454:	f042 0201   orr.w	r2, r2, #1
 8000458:	600a        str	r2, [r1, #0]
 800045a:	e00d        b.n	8000478 <blinky2::main+0x78>
 800045c:	690a        ldr	r2, [r1, #16]
 800045e:	f013 0f01   tst.w	r3, #1
 8000462:	f022 0201   bic.w	r2, r2, #1
 8000466:	610a        str	r2, [r1, #16]
 8000468:	f083 0201   eor.w	r2, r3, #1
 800046c:	bf14        ite	ne
 800046e:	f8c0 c018   strne.w	ip, [r0, #24]
 8000472:	f8c0 e018   streq.w	lr, [r0, #24]
 8000476:	4613        mov	r3, r2
 8000478:	690a        ldr	r2, [r1, #16]
 800047a:	f012 0f01   tst.w	r2, #1
 800047e:	d0fb        beq.n	8000478 <blinky2::main+0x78>
 8000480:	e7ec        b.n	800045c <blinky2::main+0x5c>
The generated code is about the same as the version that directly used the
stm32f30x crate. So the higher level API provided by the f3 crate is also a
zero cost abstraction.
OK. That’s all the code I’m going to show you in this post.
The abstraction layers
I’d like to step back for a bit to look at all the abstraction layers (crates) we are using:

In the above diagram, you can see that the layers are split in two halves. The layers on the left are what I like to call device agnostic layers. The crates on that side rely on hardware features available on all Cortex-M cores so they work for any microcontroller. The crates on the right side are device specific and will only work on a limited set of microcontrollers.
Here’s a recap of what each crate does:
-
cortex-m-rt. It handles the boot process and provides debugging facilities. This crate can’t be directly accessed by the application as there’s no API. This crate is device agnostic. -
cortex-m. API to use Cortex-M functionality available to all microcontrollers. -
stm32f30x, the device crate. Hardware access API specific to a device family. Operates at a register level. -
f3, the Board Support Crate. It provides a higher level API to use the microcontroller peripherals and it’s tailored for a specific development board. This crates builds on top of the device crate.
Outro
That’s it for this post. We have seen:
- A template that handles all the low level stuff: the linker script, linker arguments, sysroot customization 14 and boot sequence. I didn’t even mention the linker arguments and sysroot customization up there because you didn’t need to know about them but the template handled that as well.
-
A tool to generate an API to access all the hardware of a microcontroller.
-
How to write memory safe (zero
unsafe) single task applications, using critical sections (interrupt::free).
In the next one, we’ll fix this inefficiency:
                // Wait for an update event and clear the flag
                while timer.clear_update_flag().is_err() {}
This is blocking code that forces the processor to uselessly busy wait for a whole second when it could have been doing something more useful. Also, although critical sections give the synchronization needed to achieve memory safety, they should be used sparingly. Here we executed everything inside a critical section. We’ll fix that too. So in the next post, with just one more device agnostic crate, we’ll leverage interrupts in a memory safe manner and build an efficient multitasking application. I’ll leave you with this figure.

Let’s discuss on reddit.
-
RAM is split in two non-contiguous memory regions. One is 40 KiB big, the other is 8 KiB big ↩︎
-
1 KiB = 1 Kibibyte = 1024 bytes ↩︎
-
If you were wondering, LLD can’t be used because its linker script support is not on parity with GNU ld’s. ↩︎
-
It should be possible to use LLDB but I haven’t figured out how to do the equivalent of GDB’s
loadcommand. ↩︎ -
Ideally we should use some proper templating feature here. Cargo had that feature for a bit but it got removed. I don’t think it supported versioning the template though. ↩︎
-
If your device only supports flashing via a bootloader, i.e. it doesn’t expose SWD / JTAG pins, then DON’T use this template or you’ll likely brick your device. This template doesn’t support locked devices. ↩︎
-
STM32VLDISCOVERY, STM32F3DISCOVERY, Blue Pill and another board with STM32 micros, BLE400 with a nRF51 micro, and EK-TM4C1294XL with a TI micro. ↩︎
-
Here I only use one RAM region as that’s the most common scenario (most microcontrollers have one RAM region). But it’s possible to use the two memory regions of the microcontroller by placing the call stack in one and the
staticvariables in the other as done in this linker script. ↩︎ -
There’s no heap support in
cortex-m-rtat this time but it’s on the TODO list. ↩︎ -
The
hprintln!macro uses semihosting so it’s very slow, like 100s of ms per write operation. Don’t use it where timing is critical. ↩︎ -
This (WARNING big PDF file) is the reference manual of the STM32F303VCT6 microcontroller. ↩︎
-
There’s already a
svd2rustgenerated crate for this microcontroller on crates.io, thestm32f30x, but it’s instructive to do this by hand. ↩︎ -
Actually, this SVD file targets not just the STM32F303 microcontroller but the whole STM32F30x microcontroller family so the file also describes the STM32F301, STM32F302, etc. microcontrollers. ↩︎
-
Xargo by default only builds the
corecrate but most Cortex-M applications also need compiler intrinsics which are not incore. So the template uses aXargo.tomlfile to compile the compiler-builtins crate, which provides the needed compiler intrinsics, as part of the Xargo sysroot. ↩︎
